DTF transfers are revolutionizing the world of custom apparel, offering seamless and vibrant designs that cater to both novice and experienced creators alike. This innovative technique, known as Direct-to-Film printing, enables the transfer of intricate graphics onto various textiles, ensuring exceptional detail and durability. In our comprehensive DTF printing tutorial, we will explore essential techniques for designing with DTF, making your artwork not only visually striking but also long-lasting. Heat transfer printing has never been more accessible, allowing you to experiment with colors and patterns that truly reflect your unique style. Join us as we delve into the world of DTF every step of the way, unlocking the potential for stunning designs that will elevate any garment.
Also referred to as Direct-to-Film print applications, these techniques are transforming how we approach textile graphics, enhancing creativity in fashion design. This method of heat transfer printing showcases the beauty of custom creations, enabling designers to achieve high-quality, vibrant results on a multitude of fabrics. From beginners to professionals, anyone can benefit from learning effective DTF printing techniques in order to craft eye-catching apparel designs. Exploring alternative methods like this not only broadens your skill set but also opens the door to unique, personalized fashion statements. Let’s dive deeper into the fundamentals of this exciting printing technology and discover what it can do for your custom projects!
What Are DTF Transfers?
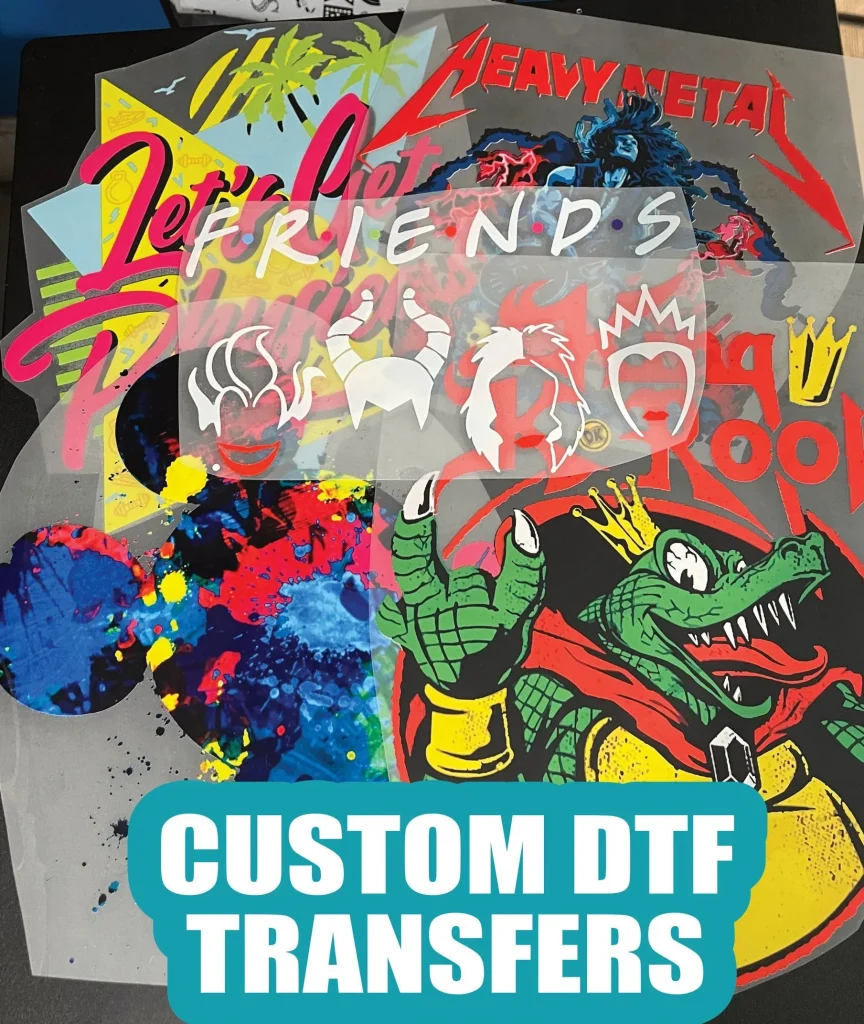
DTF transfers, or Direct-to-Film transfers, represent a modern innovation in the realm of textile printing. This technique involves printing graphics onto a special film that has been coated to accept ink, followed by a layer of adhesive powder. Once the design is printed, heat and pressure are applied to transfer the ink onto various fabrics, resulting in high-quality, durable prints. This method stands out due to its capability to produce intricate designs and vibrant colors while remaining versatile across different material types. With DTF, artists and designers can create stunning visuals that last.
Unlike screen printing, which can become cost-prohibitive for small runs due to setup costs, DTF printing allows for smaller batch sizes without sacrificing quality. This makes it an ideal choice for custom apparel, especially when dealing with intricate designs or multi-color applications. Moreover, DTF transfers are perfect for garments made from cotton, polyester, blends, and other substrates, ensuring that the possibilities are virtually endless for any designer looking to explore the textile printing landscape.
Essential Supplies for DTF Printing
Getting started with DTF printing requires a selection of essential supplies. First and foremost, a DTF printer is crucial; it needs to support the required ink types and film for printing. The DTF film itself is specially designed to bond with the ink and adhesive, creating a flawless transfer. Alongside this, adhesive powder is necessary for ensuring that the ink adheres properly to the garment during the heat pressing process, allowing for durable and long-lasting prints.
Additionally, a reliable heat press machine is required to apply the necessary heat and pressure during the transfer phase. This machine is pivotal in ensuring that every design is transferred successfully onto the fabric. Lastly, a capable design software, such as Adobe Illustrator or Kittl Lettering, is essential for creating striking visuals that will enhance the appeal of your custom apparel. By gathering these critical supplies, you lay the groundwork for a successful DTF printing experience.
Creating Your Unique DTF Design
One of the most exciting aspects of DTF printing is the creative freedom it affords designers. Starting with a high-quality design is key to achieving remarkable results. When designing, the importance of utilizing high-resolution graphics cannot be overstated. This ensures that details remain sharp and vibrant once printed onto the fabric. Choosing colors wisely to leverage DTF’s capability for brightness can significantly enhance the overall impact of the design, making your custom apparel stand out.
Furthermore, considering the placement and size of your design is essential. Designers should visualize how the final product will appear on the garment, taking into account the color and style of the fabric. Experimentation can lead to discovering unique combinations that resonate with your audience, helping you create memorable pieces that are not only functional but also visually stunning.
The Step-by-Step Printing Process for DTF Transfers
Printing DTF transfers involves a series of methodical steps designed to ensure high-quality output. First, you’ll need to load the DTF film correctly into your printer. This may seem straightforward, but improper loading can lead to print errors that waste materials and time. Next, adjusting printer settings to align with the specifications of the DTF process is crucial; this includes selecting the right color profiles and resolution settings.
After your setup is complete, it’s time to execute a test print. This preliminary test helps verify that your design appears as intended, allowing for adjustments if necessary. Once satisfied, the final print will require quickly following up with sprinkling the adhesive powder while the ink is still wet, ensuring even coverage. From here, everything is in place for a successful transfer, highlighting the importance of precision and care throughout the printing process.
Effective Application of Adhesive in DTF Transfers
Applying adhesive in the DTF process is a key step that significantly influences the final quality of the print. Once the design has been printed, while it’s still wet, the adhesive powder must be evenly sprinkled over the image. This coverage is crucial; uneven application can lead to areas where the ink does not adhere properly, potentially ruining the transfer. Taking your time during this step can lead to much more professional results, as the adhesive acts as the bond between the ink and the fabric.
After applying the adhesive, the next critical phase is heat setting. This involves placing the printed film into an oven or heat press to activate and set the adhesive. Achieving the right temperature and time is essential; too little heat may result in a weak adhesion, while too much could damage the film or fabric. By mastering the adhesive application and heat-setting processes, you’ll enhance the durability and vibrancy of your DTF prints, showing your craftsmanship in custom apparel.
Transferring Your Design with Precision
The final step in the DTF process revolves around skillfully transferring your design onto the fabric. This requires careful placement of the printed DTF film onto the garment, ensuring correct alignment to maximize visibility and aesthetic appeal. Incorrect positioning can lead to misfires, impacting the overall look of the final product. Therefore, taking meticulous care in this step is vital for ensuring that your custom apparel looks as intended.
Using the heat press, you will apply pressure and heat according to the specific guidelines of your selected fabrics. Generally, maintaining steady pressure and following the recommended time is necessary for the transfer to bond effectively. As you peel the film away post-transfer, it’s essential to do this gently to avoid damaging the print. This moment of unveiling is where all your previous efforts come to fruition, showcasing your unique design beautifully displayed on the garment.
Frequently Asked Questions
What are DTF transfers, and how do they work?
DTF transfers, or Direct-to-Film transfers, are an innovative method for applying intricate designs onto fabrics. This technique uses a special transfer film that gets printed with colorful graphics, then coated with adhesive powder. After heat setting the adhesive, the design is transferred onto textiles through a heat press, resulting in vibrant and durable custom apparel.
What do I need to get started with DTF printing?
To begin with DTF printing, you’ll need several key supplies: a DTF printer, DTF film, adhesive powder, a heat press machine, and design software such as Adobe Illustrator. These tools will help you create stunning designs and ensure a successful transfer process.
How can I create stunning designs with DTF transfers?
Creating stunning designs with DTF transfers starts with using high-quality graphics in your design software. Choose vibrant colors wisely and ensure your design fits well on the garment, considering size and placement. Following a step-by-step process from design to transfer is crucial for successful results.
What materials work best for DTF printing?
DTF printing is versatile and works well with a variety of materials including cotton, polyester, and blends. Experimenting with different fabric types can yield beautiful results, making DTF an excellent choice for custom apparel.
What are some best practices for applying DTF transfers to garments?
Best practices for applying DTF transfers include ensuring the design is properly aligned on the fabric, applying firm pressure with the heat press at the correct temperature (typically around 320°F) for 15-20 seconds, and allowing the transfer to cool slightly before peeling off the film to achieve a smooth finish.
Can I wash garments printed with DTF transfers?
Yes, garments printed with DTF transfers can be washed, but it’s important to care for them properly. To prolong the life of the print, wash the fabric inside out in cold water and avoid using abrasive detergents. This will help maintain the vibrancy and quality of your custom designs.
| Step | Action | Key Points |
|---|---|---|
| Step 1: Gather Supplies | Collect necessary materials to start your DTF transfers. | DTF printer, DTF film, adhesive powder, heat press machine, design software. |
| Step 2: Create Your Design | Design a graphic using software. | Use high-quality graphics, vibrant colors, and suitable sizing. |
| Step 3: Print Your Design | Load film and set printer settings before printing. | Run test prints for quality assurance. |
| Step 4: Apply Adhesive | Sprinkle adhesive powder and heat set it. | Ensure even powder coverage for effective bonding. |
| Step 5: Prepare for Transfer | Cool the printed film before use. | Cooling is crucial for good adhesive application. |
| Step 6: Transfer Your Design | Position film on fabric and heat press it. | Correct temperature and pressure ensure a clean transfer. |
| Tips for Success | Experiment with designs and take care of prints. | Wash inside out and stay updated with DTF advancements. |
Summary
DTF transfers present an innovative and creative method for producing custom designs on various textiles. By utilizing this step-by-step tutorial, anyone, from novices to experts, can leverage DTF transfers to create striking garments and unique patterns. With DTF technology, you gain the flexibility to experiment with different designs, colors, and fabric types, ultimately bringing your artistic aspirations to life. As DTF printing continues to evolve, staying informed about new techniques and advancements will enhance your creative projects and ensure professional-quality results.


